Documentation
Setup
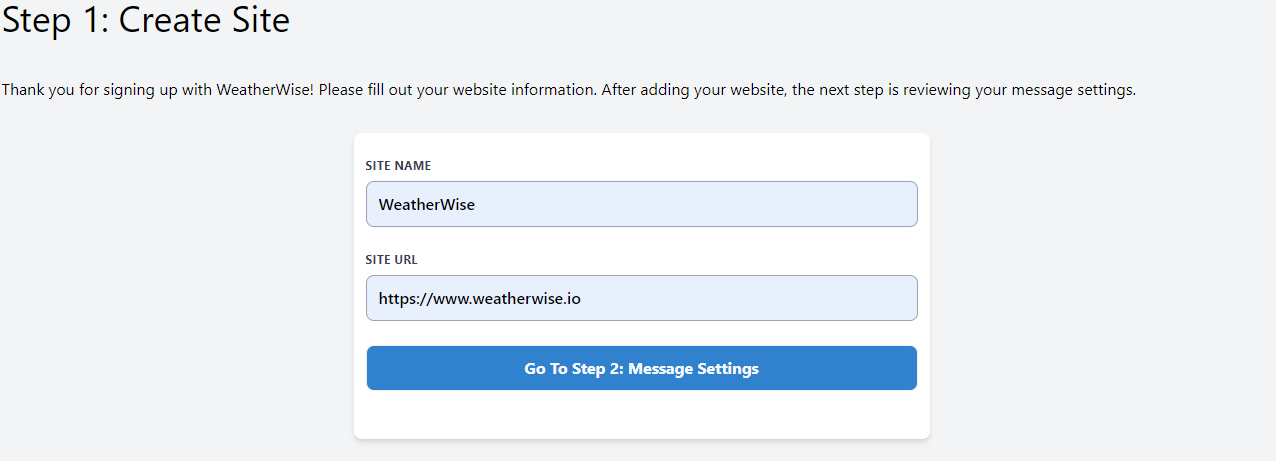
WeatherWise setup wizard walks you through the 4 step process to get everything running with WeatherWise. Approximate time to complete all 4 steps is 20 minutes.
Site Info

The first step is to enter your site name and url.
Settings
Step 2 is to create your settings for WeatherWise message display
Days In Advance

This settings allows you to specify which day's weather your customers will see. If you select 5 days in advance, and your customer browses your site on Monday, they will see messaging based on the what the weather will be in their area on Saturday.
Referring Domains

This setting allows you to restrict which domains can serve messages from WeatherWise. This is not required, but can be useful to prevent malicious actors from using your display credits.
Weather Priority

Weather is unpredictable. Some days there will be different types of weather forecasted throughout the day. This setting allows you to decide which messages appear if there are conflicting types. Tip: More severe weather (rain, snow, freezing) tend to do better than more mild weather (clear skies, cold)
Create Messages
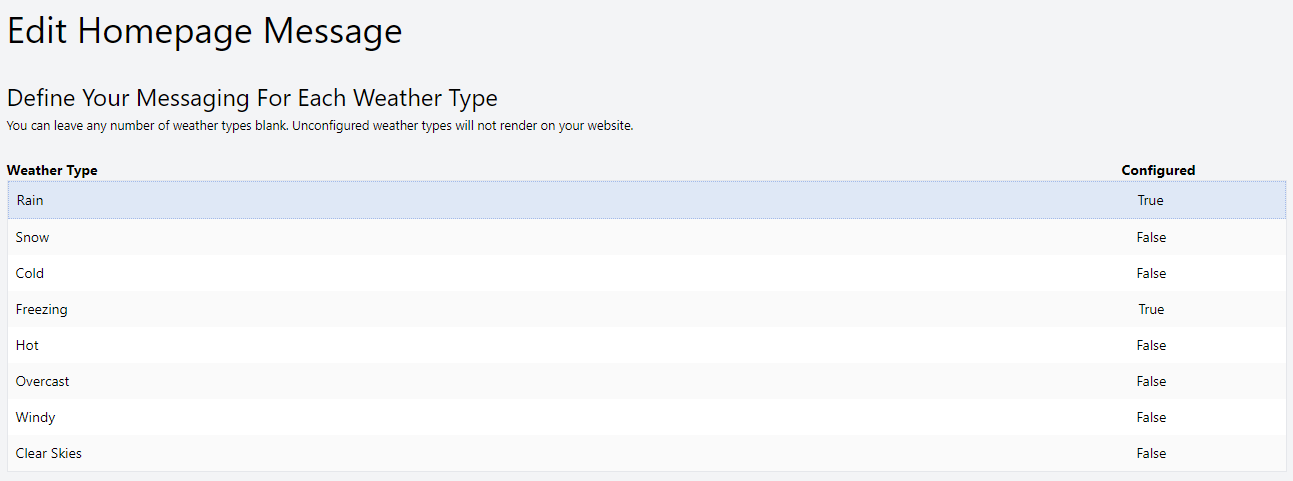
Step 3 allows you to create messages. You can have any number of messages associated with your WeatherWise account. Each message is called a configuration. Each configuration supports up to 8 weather types. Each weather type can show unique messaging.
Message Configurations

Begin by creating a new message from the setup wizard or by selecting the Messages link in the header. Give each message a unique name that will be meaningful to you. This is the label that will appear in WeatherWise reporting.
Weather Types

WeatherWise supports 8 types of weather. Select a weather type and the message will appear in the text box below.
WeatherWise allows raw HTML input for users that want more granular control and provides a WYSIWYG editor for users that want a no hassle experience. There is a toggle to switch between types. Tip: Adding raw HTML and enabling the WYSIWYG editor will render the HTML you've just added


Installation
Step 4 is installing the WeatherWise widget on your website. This is the final step. Messages will begin appearing to your users after the widget is installed and messages are configured.
Embed Javascript Widget

Add this script to every page of your website. This allows WeatherWise to display relevant messaging and track when users see messages, when users click messages, and when users make purchases after interacting with messages.
Add Purchase Information

Add the purchase amount to your order confirmation page. The amount should be an integer value of the smallest currency unit. In the United States, there are 100 cents in $1. A purchase price of $17.89 should appear as 1789. WeatherWise will only track purchases if messages were displayed or clicked on by a user.
Add WeatherWise HTML

For each message you configure, add the generated HTML to your website in the location you expect the message to appear. WeatherWise scans your webpage for this HTML and fills it with the appropriate messaging based on your users' location and your message configurations.